82
To Order Tel: 01274 533233 . Fax: 01274 537663 . Email:
Anchorage, Implants
and Extra-Oral Products
Spider K1 - K2 Placement
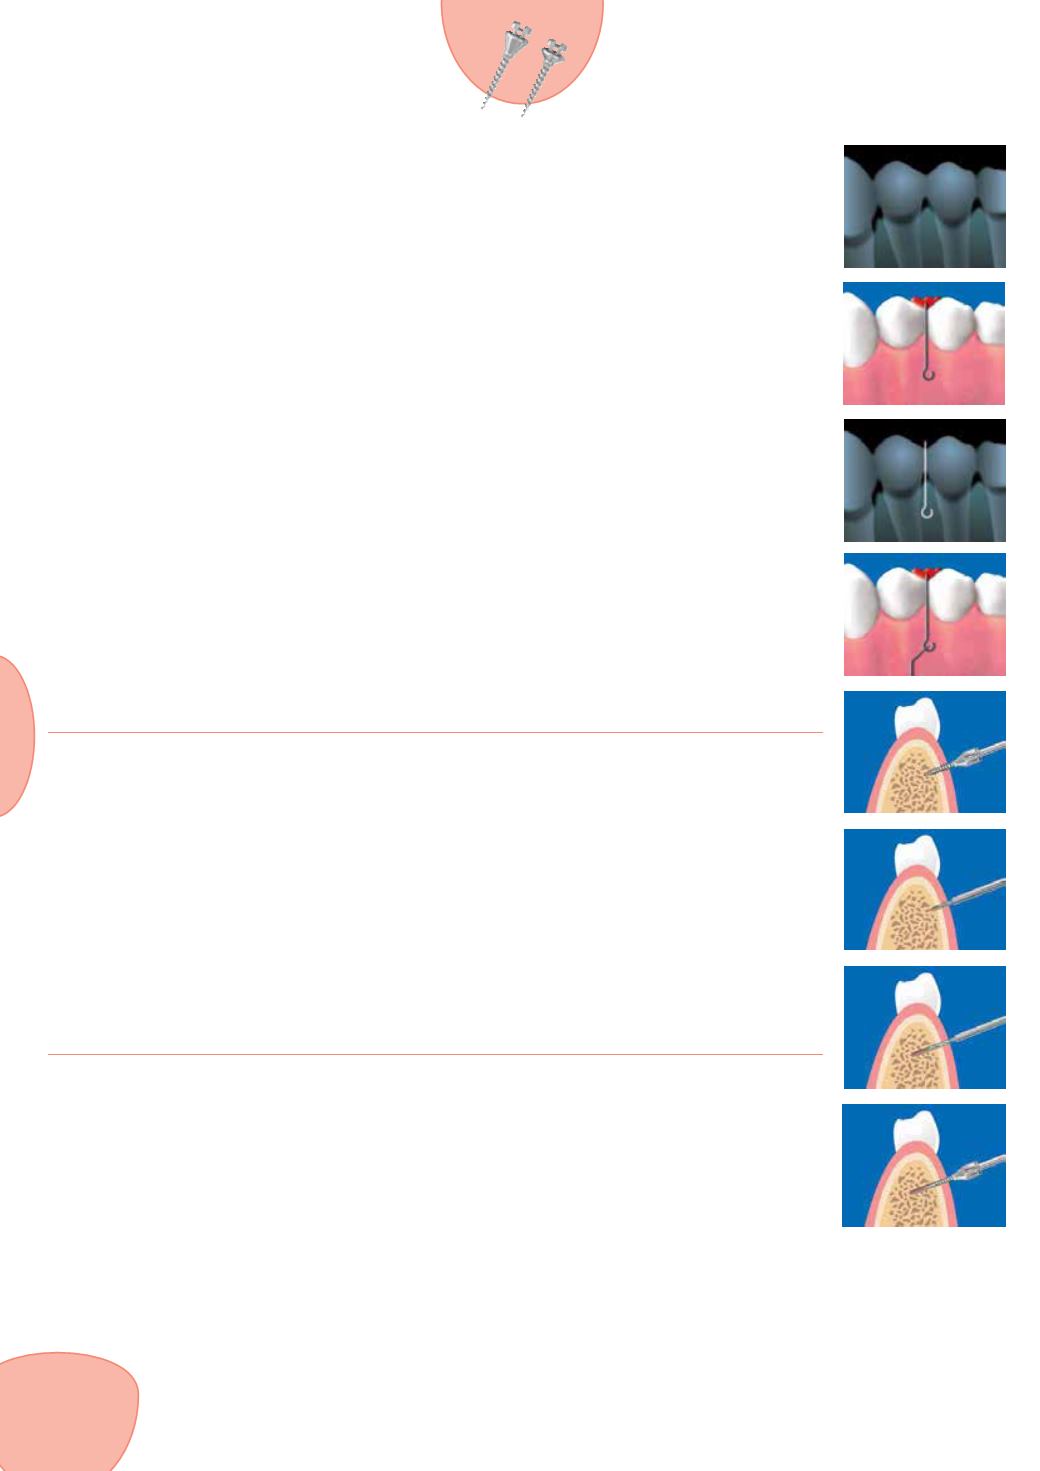
If a Spider Screw is to be inserted in an edentulous area where there is bone availability, references from
a panoramic radiograph can be sufficient.
1. In areas close to delicate anatomical structures, such as interadicular spaces, a long cone radiograph
is recommended.
2. A surgical splint can be made with orthodontic wire, fixing it to the teeth with acrylic or thermoplastic
resin. The orthodontic wire is inserted in the acrylic resin and is appropriately bent so that its tip
corresponds to the point of insertion of the Spider Screw.
3. Use a periapical radiograph (by using the long-cone parallel technique) to verify the correct
placement of the orthodontic wire.
4. The insertion site can be marked with a pressure point or methylene blue dot on the soft tissue.
In mobile mucosa it is recommended to leave the surgical guide in place during the drilling phase and/or
the screw insertion.
5. After site disinfection (chlorhexidine) insert the Spider K1 or K2 using the manual pick-up driver 7DSX-
1690S and 7DSP-5052S. It is also possible to use the contra-angle pick-up driver 7DPQ-2820 at low
speed (25/30 rpm). In order to avoid excessive torque stress during insertion, (which could cause bone
compression and consequent recession or cause the screw to break) it is recommended to use a technique
of alternating between screwing and unscrewing to gradually ease the screw into position.
Final placement is achieved by using the handle driver 7DSQ-2824 to complete the insertion as this
provides the most controlled tactile method.
6. In the case of very compact bone use a spiral drill (7FSC-1108 for K1 or 7FSC-1309 for K2) to make
a pilot hole which makes screw insertion easy to perform.
Spider Pin - C1 Placement
Follow points 1 to 4 as above.
5a. After site disinfection (chlorhexidine) the spiral drill is used to perforate the soft tissue and cortical
bone (no incision needed). Cold irrigation is used during the drilling procedure (5°C/41°F).
Use the 0.9 mm drill for the PIN, and 1.2 mm drill for the C1 Spider Screws.
6a. You can choose between two options: manual or mechanical insertion. For manual insertion use
7DSX-1690S and 7DSP-2352S for PIN, 7DSX-1690S and 7DSP-5052S for C1 Spider Screws. For
mechanical insertion use the contra angle pick-up driver 7DPQ-2322 for PIN, and 7DPQ-2820 for C1
Spider Screws mounted on a low speed contra-angle handpiece (25/30 rpm).
Final placement is achieved by using the handle driver to complete the insertion as this provides the most
controlled tactile method.
Post Application Patient Instruction
Application of chlorhexidine rinse 2 – 3 times per day for the first 7 days. Perform normal hygiene
procedures. The patient should brush the screw normally as a tooth.
Spider Screw Removal
To remove the Spider Screw, it is simply unscrewed with the appropriate screwdriver. For anterior and
lateral areas is advisable to use the handle driver. While for posterior areas is advisable to unscrew with
contra angle pick-up driver. This can be accomplished with or without anesthesia. If the Spider Screw
does not unscrew easily it is recommended to use a technique of alternating between unscrewing and
screwing. Healing takes place in a few days.
1
2
3
4
5
6
5a
6a


